III.) DAvE - Microcontroller Initialization after
Power-On:
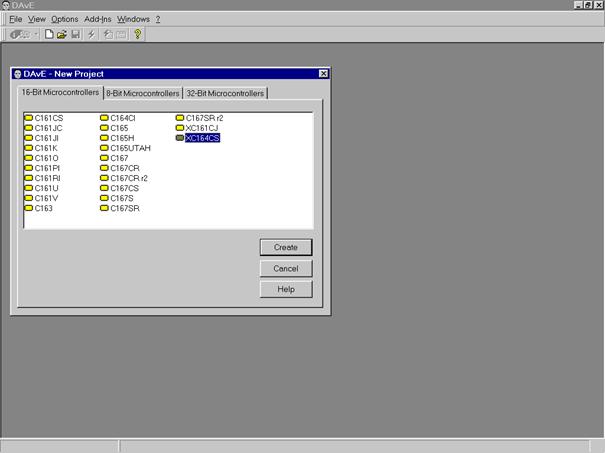
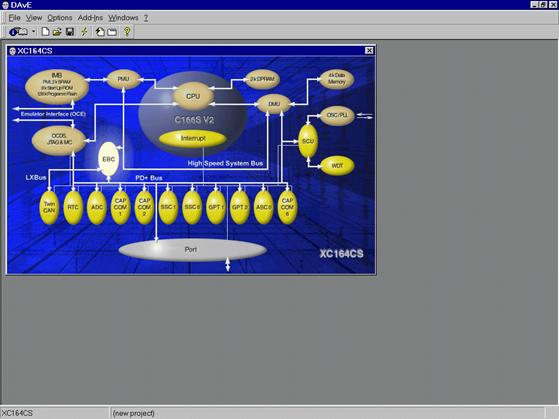
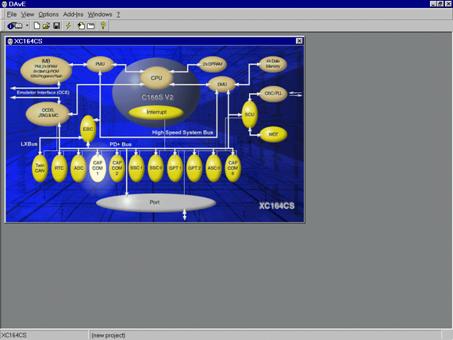
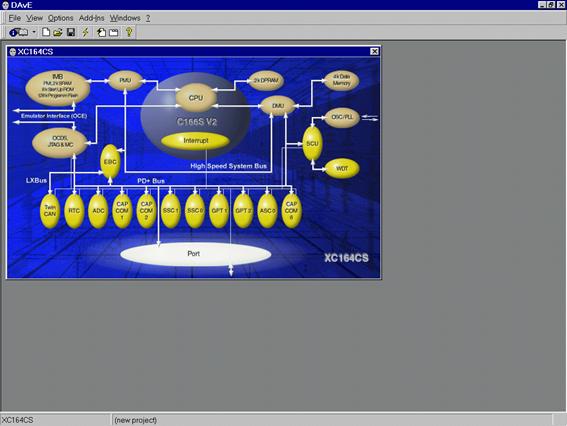
1. Step: Start the programm generator DAvE and
select the XC164CS microcontroller:
File;
New;
16-Bit Microcontrollers;
XC164CS;
Create:
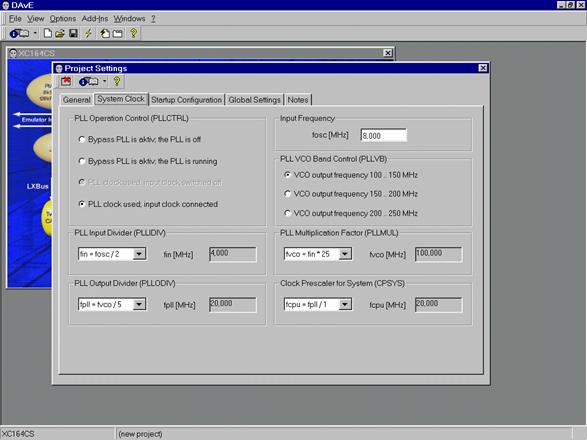
2. Step – Choose the Project Settings as you
can see in the Screenshots:
General:
For the KEIL Compiler choose Keil in the Compiler Settings:

General:
For the TASKING Compiler choose Tasking in the Compiler Settings:

System Clock: -
do not change configuration, CPU Clock will be 20 MHz
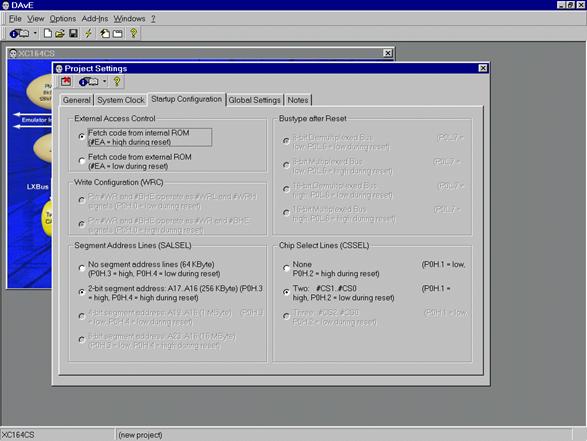
Startup Configuration: External Access Control: Select: Fetch
code from internal ROM
Global Settings: do not change configuration
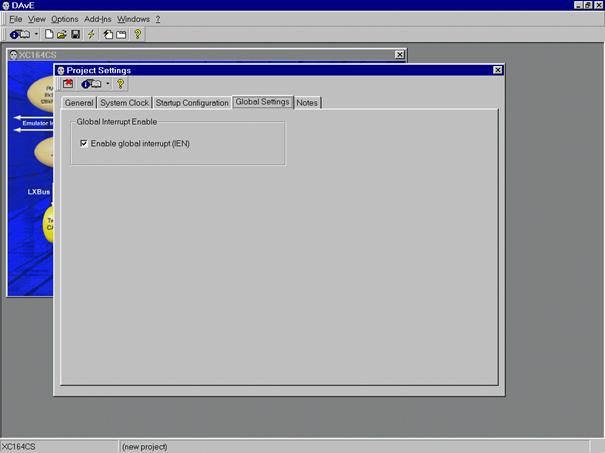
Notes: if
you wish, you can insert here your comments
Exit
this dialog now by clicking X in the close
button:

3. Step: Configuration of the EBC: (configure as you can see in the screenshots):
EBC:
Control: EBC Control: click
Disable EBC (EBCDIS)
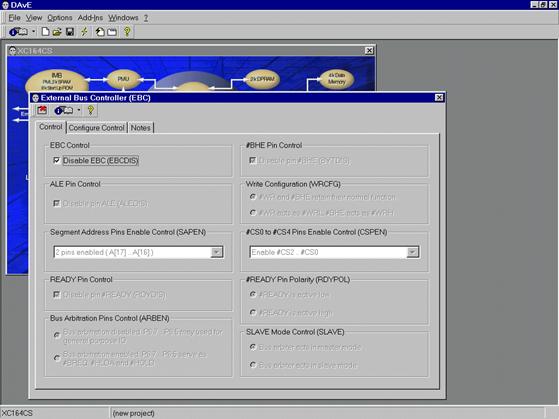
Exit
this dialog now by clicking X in the close
button.
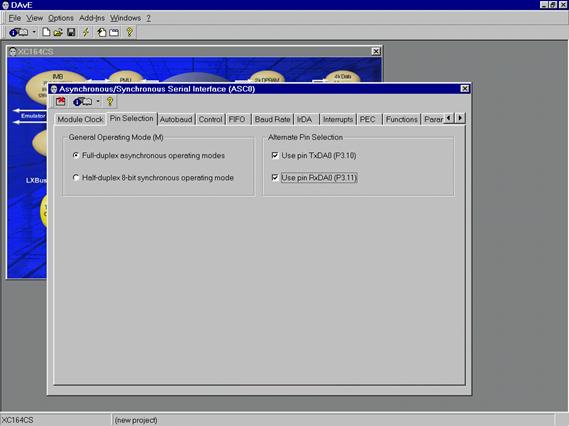
4. Step – Configuration of the ASC0:
Module Clock: (do nothing)
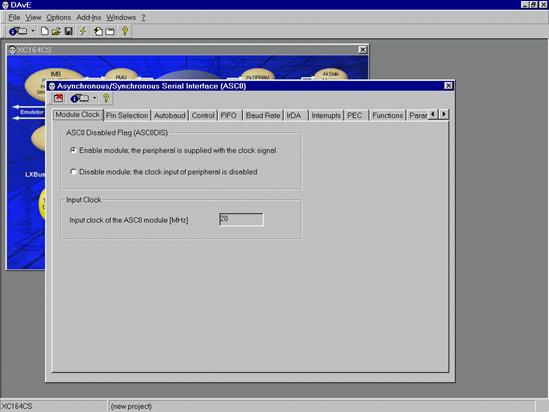
Pin Selection: (Alternate Pin Selection: click Use pin
Tx, click Use pin Rx)
Autobaud:
(do nothing)
Control:
(Receiver Enable: click Enable receiver)

FIFO:
(do nothing)
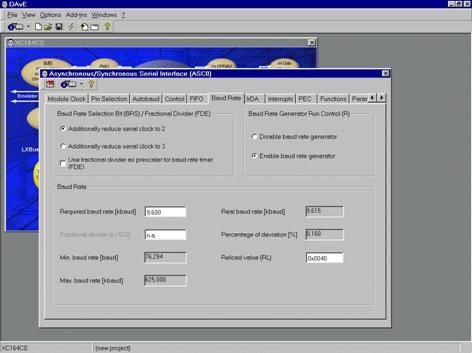
Baud Rate:
(Baud Rate: input 9,600 for the required baud
rate)
Baud Rate: (Baud
Rate Selection Bit: additionally
– if you want: click Use fractional divider as prescaler
... )
IrDA:
(do nothing)
Interrupts:
(do nothing)
PEC:
(do nothing)
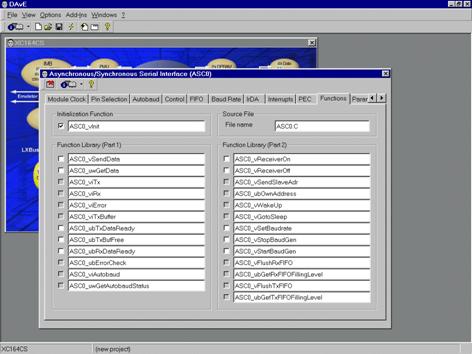
Functions:
(Initialization Function: click ASC0_vInit)
Parameters:
(do nothing)
Notes:
(if you wish, you can insert here your comments)
Exit
this dialog now by clicking X in the close
button.
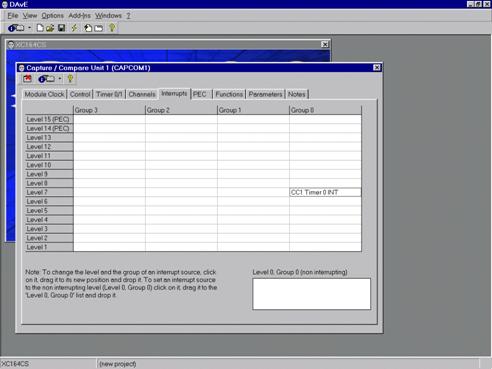
5. Step:
– configure Timer T0 in CAPCOM 1:
Module Clock:
(do nothing)
Control:
(do nothing)
Timer 0/1:
(Timer 0 Start Control: click Start T0 after
initialization (T0R))
Timer 0/1:
(Interrupt Control click Enable T0 interrupt
(IE))
Timer 0/1:
(Timer 0 Input Selection (T0I): Prescaler: choose
Module Clock/1024)
Timer 0/1:
(Timer 0 Registers: Timer 0 reload register: input
0xB3B5 for 1 second)

Channels:
(do nothing)
Interrupts: (drag and drop the CC1 Timer 0 INT to Interrupt Level
7, Group 0)
PEC:
(do nothing)
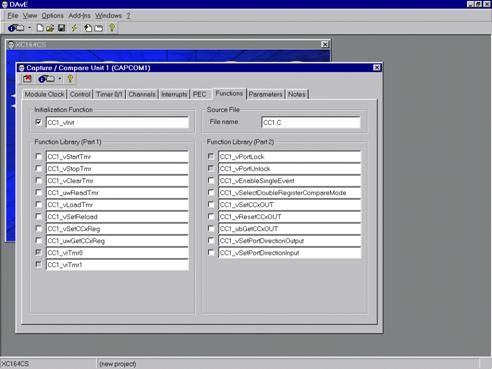
Functions:
(Initialization Function: click CC1_vInit)
Parameters:
(do nothing)
Notes:
(if you wish, you can insert here your comments)
Exit
this dialog now by clicking X in the close
button.
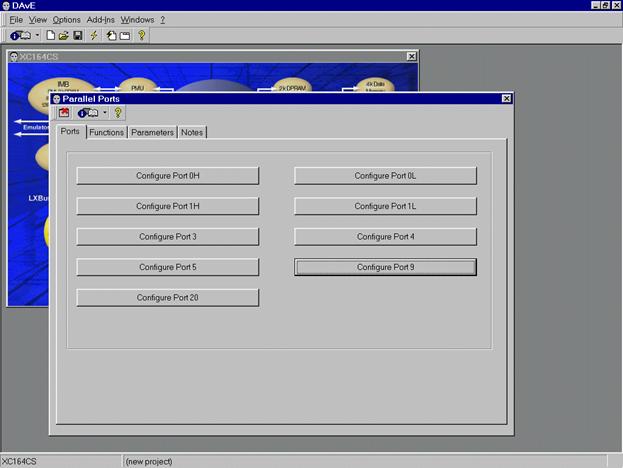
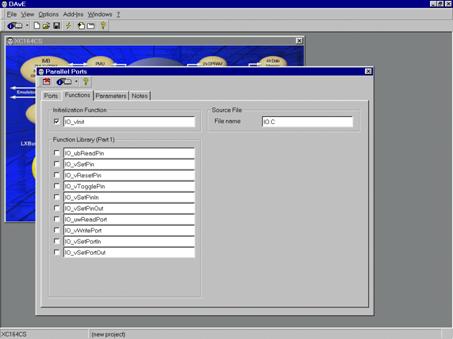
6. Step:
– configure Port 9 Pin 4 to
Output :
Ports:
(click Configure Port 9)
Port 9:
(Functionality: click Use P9.4 as general IO)
Port 9:
(Direction: click Out)

Input Characteristic: (do nothing)
Output Characteristic: (do nothing)
Parameters:
(do nothing)
Notes:
(if you wish, you can insert here your comments)
Exit
this dialog now by clicking X in the close
button.
Functions:
(Initialization Functions: click IO_vInit)
Parameters:
(do nothing)
Notes:
(if you wish, you can insert here your comments)
Exit
this dialog now by clicking X in the close
button.
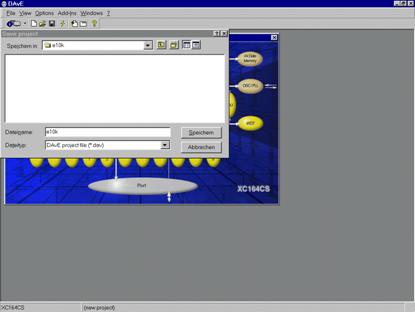
7. Step – Save the project:
File
Save
For the KEIL
Development Tools:
Location:
C:\e10k
Filename:
e10k
For the TASKING
Development Tools:
Location:
C:\e10t
Filename:
e10t

Save
8. Step – Generate Code:
File
Generate Code
or
![]()
DAvE will show you all the files he
has generated
(File Viewer opens automatically).

File
Exit
Save changes?
click Yes